


This rice cooker Oyakodon is the perfect recipe for busy home cooks who want a comforting Japanese rice bowl with little effort. This quick and easy rice cooker version delivers flavorful chicken, fluffy Japanese rice, and silky egg all cooked in one rice cooker with minimal prep.
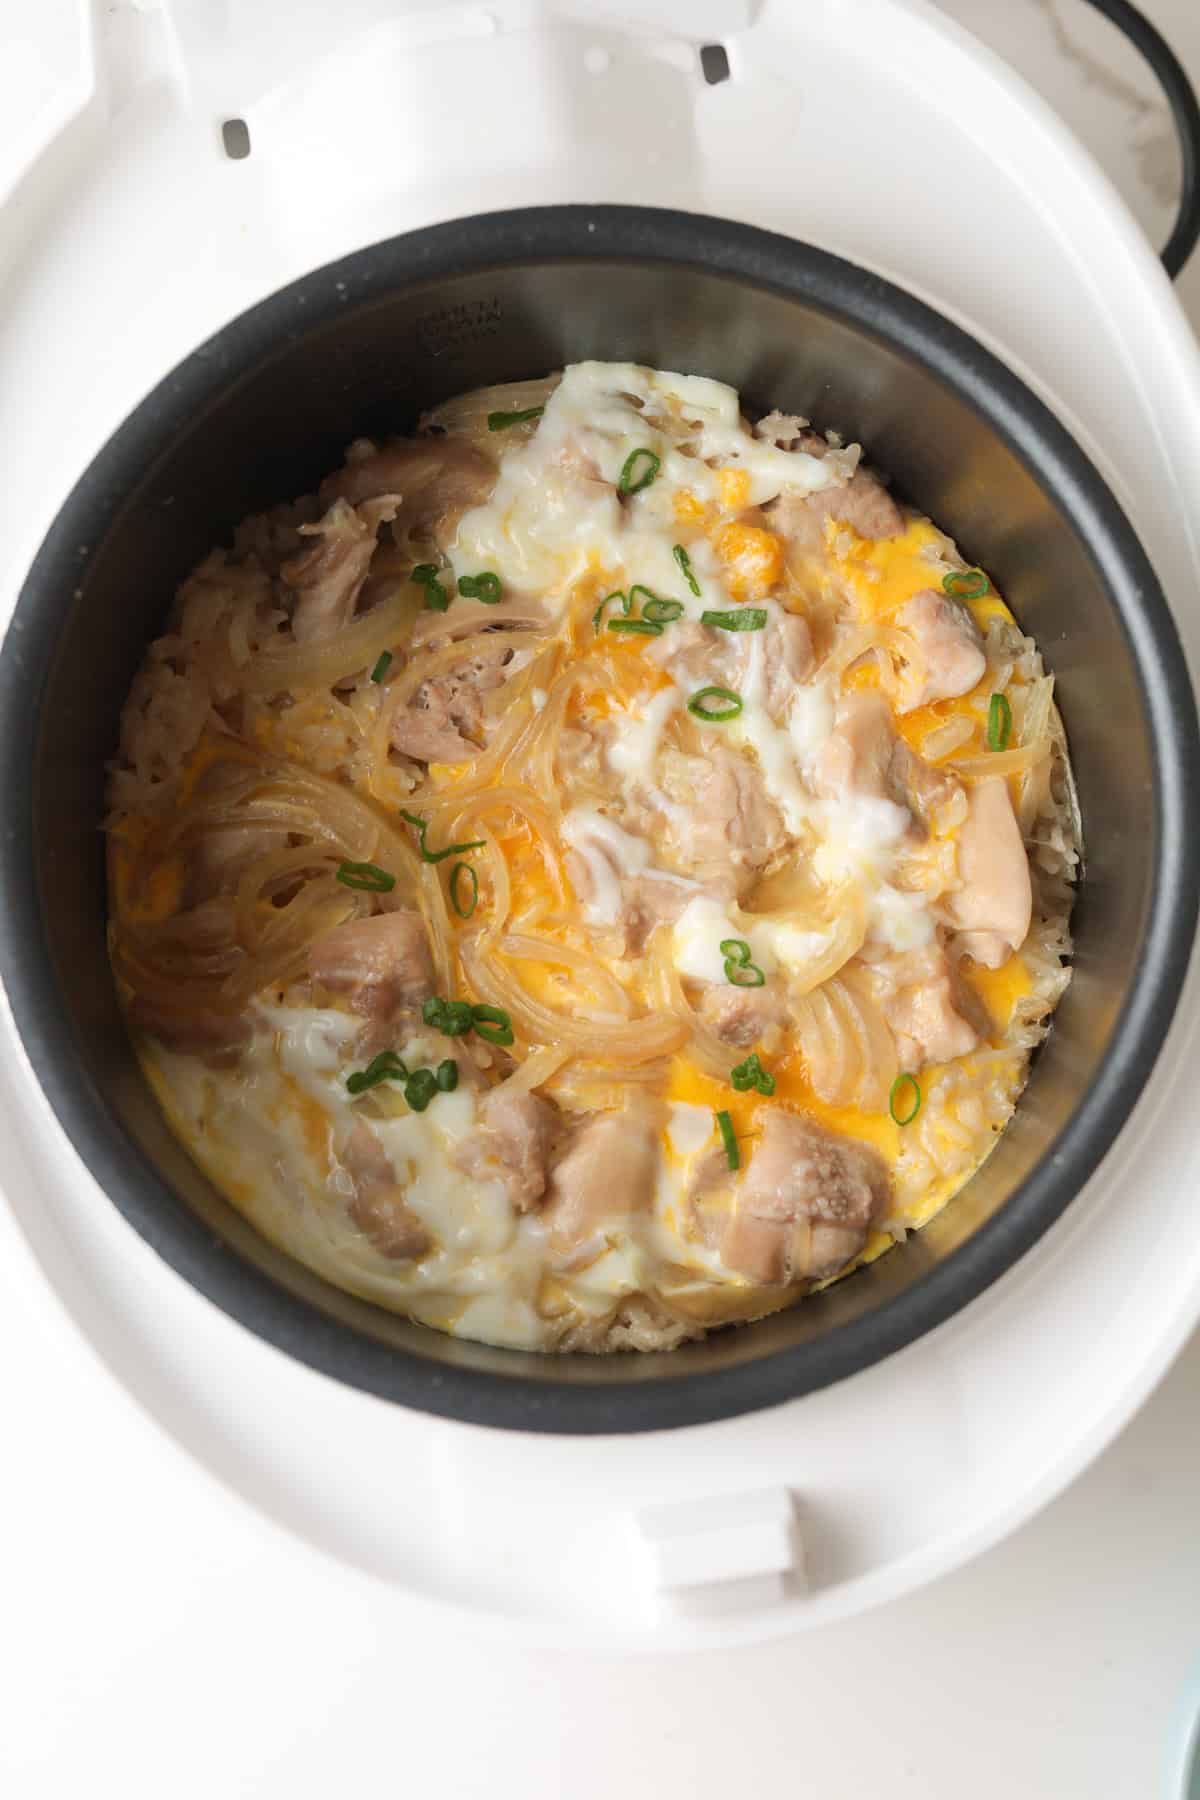
Table of contents
Why This Rice Cooker Recipe Works for Busy Families
- Beginner-friendly - You can transform six basic ingredients into an authentic Japanese meal. This recipe is so easy and fail proof!
- Set it and forget it - The rice cooker does most of the work, handles the heat, and timing, just press the button and walk away!
- Customizable - You can add veggies, garnishes, and other sauces based on your preferences.
- One pot meal - for effortless cleanup.
What is Rice Cooker Oyakodon?
Oyakodon (親子丼) translates to “parent-and-child rice bowl,” this combination refers to chicken (the parent), egg (the child), and donburi (rice bowl). It’s a popular Japanese donburi dish traditionally simmered on the stovetop with onions and a savory-sweet sauce.
This rice cooker version is a convenient twist on the classic. The rice and marinated chicken cook together in the rice cooker—a true set-it-and-forget-it meal. It’s topped with lightly mixed egg during the last few minutes of cooking on top to create that signature soft and silky finish.
Ingredients
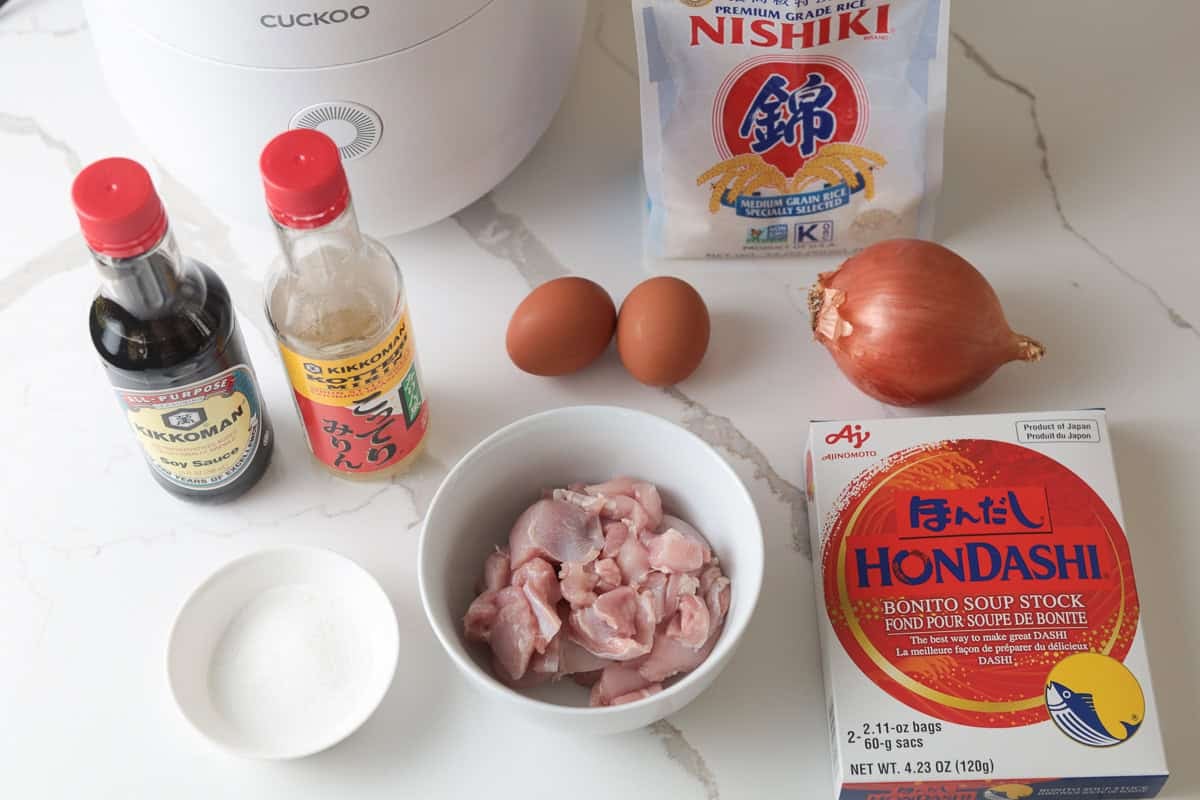
Japanese rice – Short or Medium grain rice is best for its sticky texture.
Chicken – Boneless, skinless dark meat is great for flavor and tender texture.
Seasoning– Bonito Soup Stock powder gives this dish that authentic Japanese umami flavor, mixed with soy sauce and mirin (a sweet and syrupy rice wine) to create the classic savory-sweet Oyakodon flavor.
Egg – Added during the final minutes of cooking for a soft, tender topping.
Optional toppings – Spring onions, and togarashi for added freshness and spice.
Equipment
Any standard rice cooker works for this recipe. I use a Cuckoo six-cup model because it’s great for our family of four and cooks enough rice for large parties.
How to Make Rice Cooker Oyakodon
1. Marinate the chicken
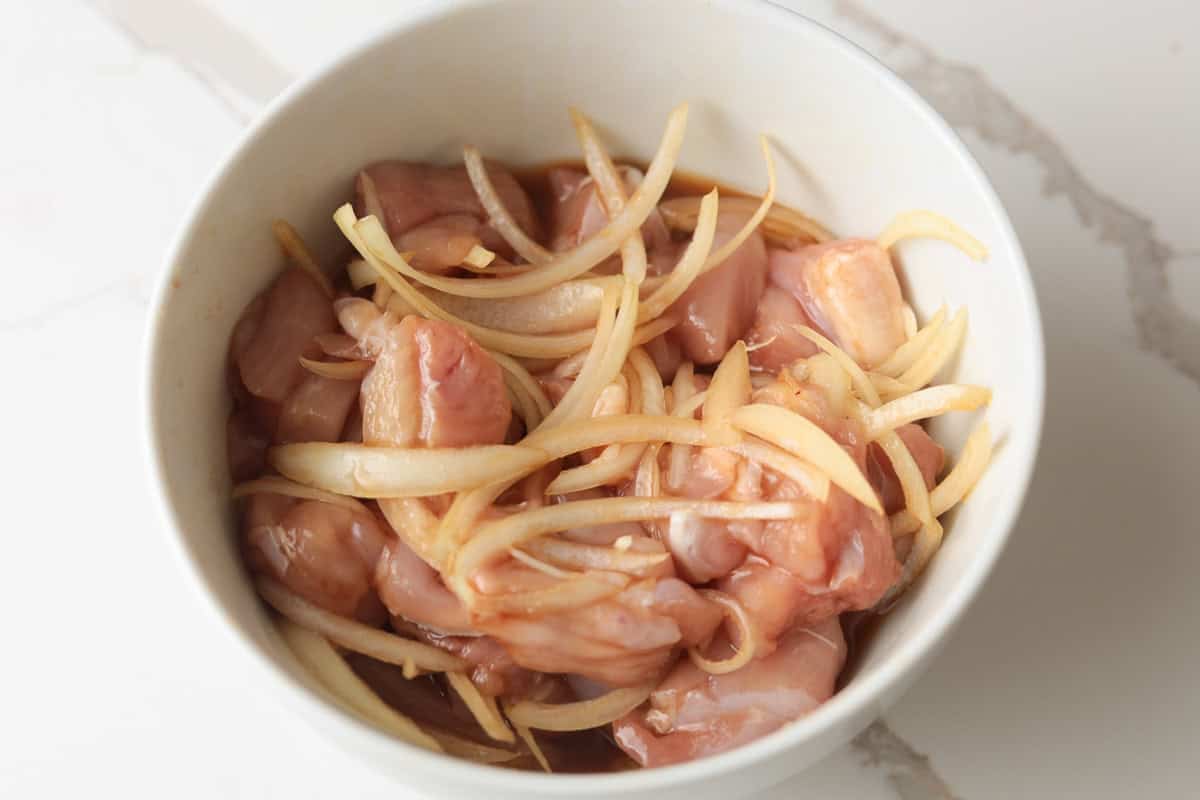
Toss the chicken pieces and sliced onions in the marinade seasoning. Marinate for 30 minutes for maximum flavor.
2. Prep the rice.
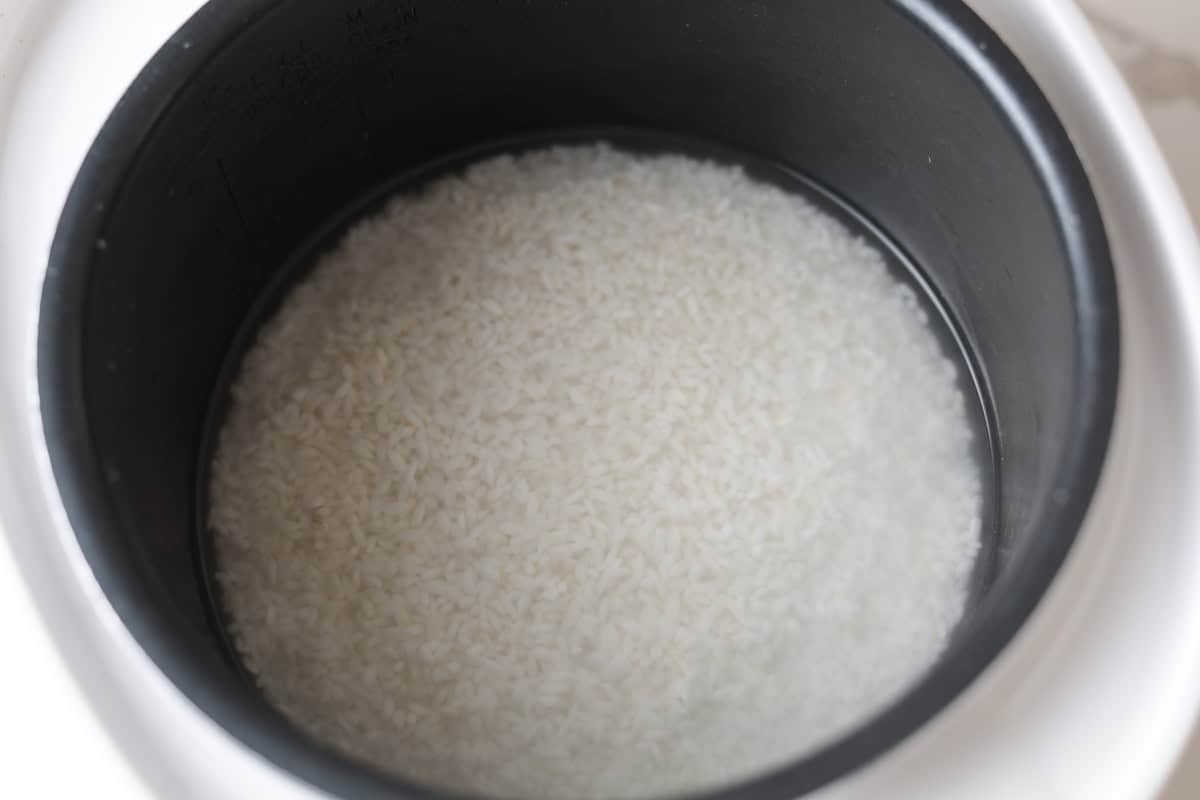
Soak the rice in water for 30 minutes, then rinse it 3 times until the water runs clearer. Drain well to avoid soggy rice.
3. Add ingredients to the rice cooker.
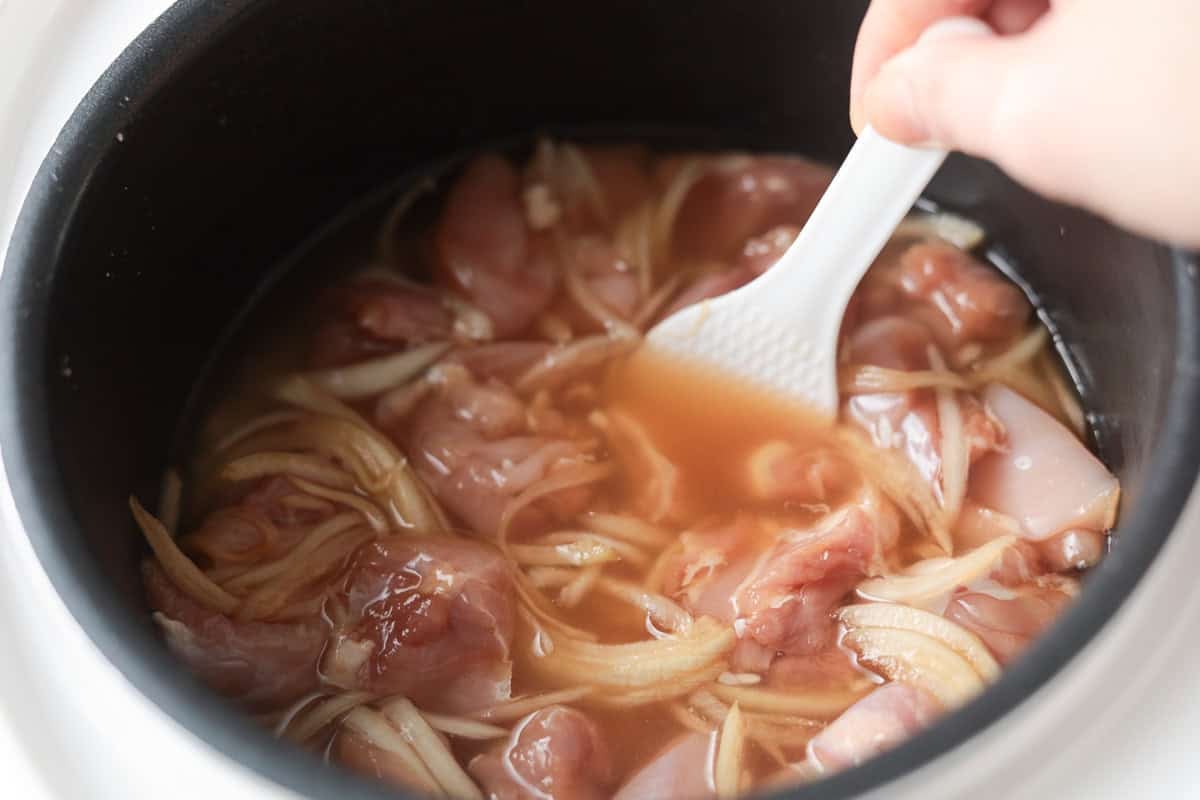
Add the rice and water to the pot. Layer the marinated chicken and onions directly on top. Add all the marinade into the rice, lightly stir the marinade into the water while keeping the onions and chicken on top of the rice.
Cook using the white rice setting, about 40 minutes, or until the rice cooker finishes.
4. Add the eggs.
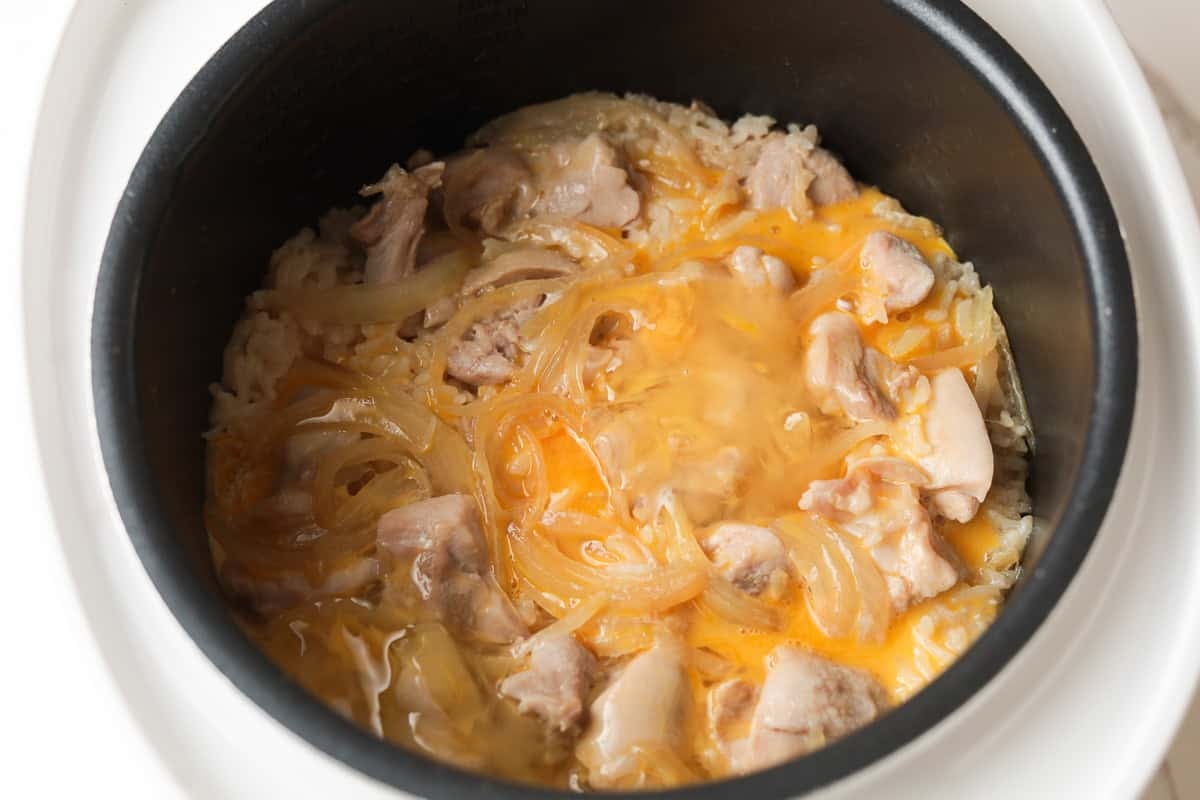
Once the timer goes off, open the lid. Lightly beat the eggs and pour them evenly over the chicken and rice. Close the lid and let it steam for 5–10 minutes. For firmer eggs, gently mix them into the rice before serving.
Prefer it firm? Let it go for 10 minutes or stir it gently into the hot rice.
Like it traditional? 5 minutes gives you that slightly runny, custardy finish.
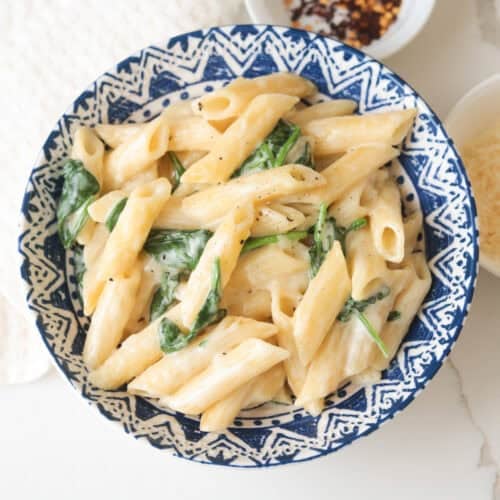
5. Serve and Garnish
Transfer everything into a deep bowl. Garnish generously with sliced spring onions and a dash of Togarashi (Japanese chili flakes) for a little heat.
Pro-Tips & Common Mistakes
- Use dark meat chicken for best taste. Chicken thighs stay juicy in the rice cooker compared to chicken breast as it can turn dry and rubbery if overcooked.
- Don’t skip soaking the rice. Soaking helps the rice hydrate before cooking. It gives you that plump, fluffy Japanese-style texture.
- Drain the rice thoroughly. Since the chicken in the oyakodon will release extra moisture as it cooks, removing as much water as possible beforehand helps prevent the rice from turning mushy. Use a fine strainer to ensure any excess water is fully drained.
- Don't peek! It’s tempting to open the lid to check on the chicken, but every time you do, you lose the precise steam pressure required to cook the rice grains evenly. Keep that lid sealed until the "finished" beep sounds.
Variations & Swaps
- Vegetarian option - Swap the chicken for extra-firm tofu. Cut the tofu into 1-inch cubes and pat them extra dry with a paper towel. Marinate them exactly like the chicken. Use a Vegan Dashi (made from kombu/seaweed) instead of bonito-based dashi.
- Gluten-Free Oyakodon - Swap regular soy sauce for Tamari or Coconut Aminos. For the dashi, Many instant dashi powders (like standard Hondashi) contain MSG and grain-based additives. Look for a certified Gluten-Free dashi powder.
What to Serve with Chicken Oyakodon

To turn this one-pot wonder into a full Japanese "Teishoku" (set meal) experience, try adding some side dishes:
Cold soba noodles: If you’re looking for a refreshing side dish, this classic Japanese favorite is a perfect choice. Simply cook the soba noodles according to package instructions, rinse them in an ice bath to cool, then serve with the sauce.
Cucumber salad: Soak cucumber in salt and mix with rice vinegar, chili oil, and fresno chili. This refreshing addition cuts through the richness of the egg and chicken dark meat.
Morning Glory Garlic Stir-fry: If you want a leafy veggie side, this Southeast Asian water spinach is an earthy and hearty vegetable stir-fried with garlic and fish sauce.
Japanese Onigiri Rice Triangles: For a more filling meal, pair your dish with onigiri. It uses short-grain rice shaped into triangles and wrapped in nori.
Storage & Reheating Instructions
Oyakodon is best enjoyed fresh because of the delicate texture of the eggs, but it still makes for a fantastic "deskside" lunch the next day.
- Fridge Storage: Transfer leftovers to an airtight container within 2 hours of cooking. It will stay fresh in the fridge for up to 3 days. Make sure your eggs are fully cooked prior to storing it in the fridge.
- Microwave: Place a portion in a microwave-safe bowl. Sprinkle one teaspoon of water over the rice to keep it from drying out. Cover with a damp paper towel and heat in 30-second intervals until steaming.
NOTE: We do not recommend freezing this dish. Cooked eggs often become rubbery when thawed, and it ruins the fluffy texture of the rice.
FAQs
Yes, you can use chicken breast, but keep in mind that it tends to dry out more easily in a rice cooker. If you choose breast meat, cut it into slightly larger pieces to prevent overcooking.
Add the eggs when the rice cooker indicates it’s done—either “done” or “warm,” depending on how it’s indicated in your rice cooker model.
Mushy rice usually means there was too much water or it wasn’t drained well after rinsing.
Yes, it’s safe as long as the eggs cook from the steam. Keep the rice cooker lid closed for at least 5 minutes so the residual heat cooks the eggs.
More Rice Cooker Recipes


Easy Rice Cooker Oyakodon
Equipment
Ingredients
- 1 cup medium grain (or short grain) Japanese rice Use standard U.S. measuring cup , 1 cup = 240 ml or 1 ½ cup ( rice cooker cup)
- 1 ¼ cup water
- 10 oz chicken -boneless, skinless, dark meat cut into 1 inch pieces
- ¼ onion sliced thinly
- 1 teaspoon Bonito Soup Stock Hondashi brand
- 1 tablespoon mirin
- 1 ½ tablespoon soy sauce
- 1 teaspoon sugar
- 2 eggs, lightly whisked
Instructions
- Add the cut chicken pieces, sliced onions, bonito granules, mirin, soy sauce and sugar into a bowl and mix well. Set aside and allow to marinade for 30 minutes.
- Add the rice to a rice cooker pot, add enough water to cover the rice. Set aside to soak for 30 minutes.
- After 30 minutes, drain and rinse the rice at least 3 times or until the water runs clearer. Drain really well to avoid soggy rice.
- Add 1 ¼ cup water to the rice.
- Add the marinated chicken and onions directly on top of the rice, making sure to pour all the marinade in. Lightly stir the marinade into the water while keeping the onions and chicken on top of the rice.
- Cook on white rice setting. Or press cook on a standard rice cooker.
- When the rice is done, open the rice cooker lid and evenly spread the whisked eggs over the chicken and rice. Create a thin layer to ensure the eggs steam well.
- Close the rice cooker lid, let the eggs steam for at 5-8 minutes.


Leave a Reply